Support Us
If you like our work, please consider giving us a tip. Even small donations helps us a lot to keep development going

Example shows how you can modify the way device content is displayed. For the purpose of the example, device with RGB Led will be used (device code can be found in attached .zip package). If you don't have RGB Led, you can use 3 ordinary leds - this is just for demonstration purposes.
RGB led is simply 3 individual leds (red, green and blue) combined in one package. To get the color you want, you need to set desired brightness for each led individually. With default User Interface, RGB Led device will look like this: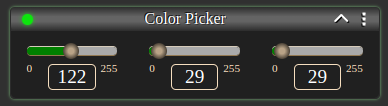
As you can imagine, setting proper color this way might be inconvenient. In this example, we will modify default User Interface to display Color Picker in a user-friendly manner: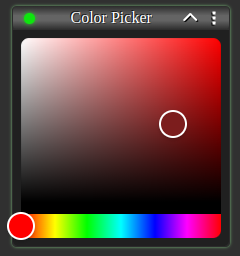
Full example code can be found on examples/CustomizedDevice branch of stargate-js-mono repository. Here you can see code that was added.
Setup
Before modifying User Interface, you need to set up device having RGB Led connected. In attached .zip package, you can find RGB_LED_Arduino and RGB_LED_Raspberry directories, which contains device code ready to use with relevant platform (check declared pin numbers to connect your led).
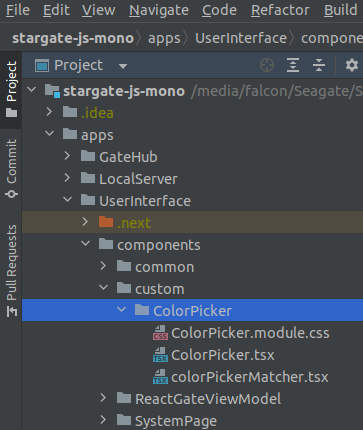
Once your device is ready, set up project as in Customization reference. Create custom directory under ./apps/UserInterface/components and copy ColorPicker from attached .zip package to created directory (it is a good practice to separate your custom code from default code by putting it to separate directory).
ColorPicker component uses react-colorful library internally, so you need to install it by running
When the above is done, import and add colorPickerMatcher to customMatchers array of Device.tsx file, as shown in Customized Device reference section.
npm -w ./apps/UserInterface install react-colorful
command in terminal under stargate-js-mono root directory.When the above is done, import and add colorPickerMatcher to customMatchers array of Device.tsx file, as shown in Customized Device reference section.

Now your project should be ready. Start development server or build and replace User Interface on destination server to see the results. Check attached code snippets to find out how components are wired together.